ADA Compliance Checklist for Final Inspection: A GC's Pre-CO Walkthrough Reference
A failed ADA inspection at the end of a commercial project costs the GC three things at once: the Certificate of Occupancy gets held, the tenant move-in date sl..
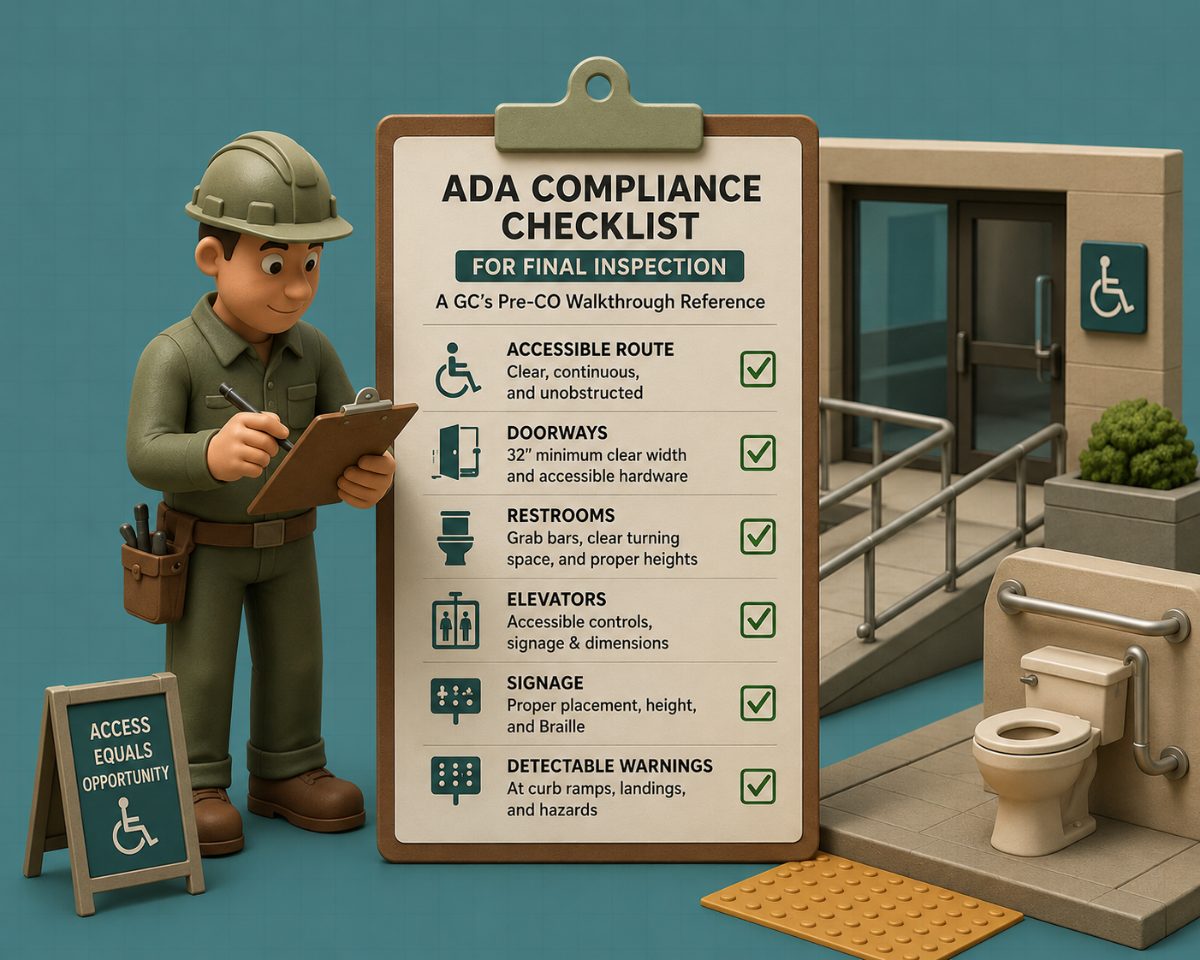
A failed ADA inspection at the end of a commercial project costs the GC three things at once: the Certificate of Occupancy gets held, the tenant move-in date slips, and the retrofit work — replacing a lavatory set 2 inches too high, re-mounting signage at the wrong centerline, re-pouring a 1:18 ramp slope that should have been 1:20, comes out of the GC's pocket under most construction contracts.
None of those failures is a surprise finding. They are visible during a pre-CO walkthrough with a tape measure, a level, and a checklist that names the dimensional thresholds the inspector will use.
This article details the field-verification walkthrough sequence a GC should run two weeks before final inspection on a commercial new construction or tenant improvement project.
Every item ties to a specific dimensional threshold from the 2010 ADA Standards or ANSI A117.1-2017, with the field tolerance and the most common installer error called out. A downloadable PDF checklist organized to match the walkthrough sequence is at the end.
When Should the Walkthrough Be Run?
Two weeks before the requested final inspection date. Earlier is too early — installers are still working. Later is too late; there is no time to retrofit. Two weeks gives the GC time to issue a punch list, get the responsible subs back, and re-verify before the inspector arrives.
For larger commercial projects (over 50,000 sf or multi-story), run two walkthroughs: one at four weeks for major elements (parking, ramps, accessible entrance, toilet room rough-in dimensions), and one at two weeks for finish-installed elements (grab bars, signage, counter heights, hardware).
What Field Tools Are Required?
25-foot tape measure, with imperial and metric readings.
24-inch and 48-inch levels for slope and plumb checks.
Digital level or smart level for slope verification, slope is the single most-failed element, and the eye cannot judge 1:48 vs. 1:40.
Door pressure gauge (5 lbf maximum for interior doors per 2010 ADA Section 404.2.9; verify state amendments for exterior doors).
Force gauge or fish scale for hardware operating force (5 lbf maximum per 2010 ADA Section 309.4).
The checklist PDF below is printed, with a clipboard.
A camera or phone for photo documentation of every measured condition.
How Should the Walkthrough Be Sequenced?
What can you ask? (Sample questions)
- How does ANSI A117.1 differ from ADA requirements?
- What accessible route slope maximums apply under IBC?
- When are accessibility upgrades triggered in renovations?
- What door maneuvering clearances does ANSI A117.1 require?
The inspector walks the building in a logical accessibility path, from the public right-of-way, through the parking lot, to the accessible entrance, through the building. Run the pre-walkthrough the same way. The sequence below covers the 12-element categories the inspector will check, in inspection order.
What Are the Exterior Approach Requirements?
The accessible entrance must be on an accessible route and identified by ISA signage if it is not the primary public entrance (2010 ADA Section 206.4). The U.S. Access Board'sGuide to the ADA Standards: Entrances, Doors, and Gates is the authoritative interpretive resource for the requirements below:
Route width: 36 inches minimum clear, 48 inches minimum at obstructions (2010 ADA Section 403.5.1, ANSI A117.1 Section 403.5.1). Field tolerance: zero. A planter or signpost installed after the curb walk that narrows the route to 35 inches is a fail.
Running slope: 1:20 (5%) maximum. Anything steeper is a ramp and requires handrails (2010 ADA Section 403.3, ANSI A117.1 Section 403.3). Field-measure with a digital level at 10-foot intervals, pour drift.
Cross slope: 1:48 (2%) maximum (2010 ADA Section 403.3). Most-failed exterior element. Concrete pours routinely come in at 1:40 or steeper because the finisher pulled cross-slope to drain.
Surface: stable, firm, slip-resistant (2010 ADA Section 302.1). Loose gravel, deep grass joints, or rough decorative pavers fail.
Changes in level: 1/4 inch maximum vertical, 1/2 inch maximum with a 1:2 bevel (2010 ADA Section 303). Field tolerance: zero. A 5/16-inch lip at a sidewalk transition is a fail.
What Are the Accessible Parking Requirements?
Stall count: per 2010 ADA Section 208.2 — 1 accessible stall per 25 total stalls up to 100, scaling down beyond that, with 1 in 6 designated van-accessible.
Stall width: 96 inches minimum for car-accessible, 132 inches for van-accessible (with 96-inch access aisle) — or 96 inches for van-accessible with a 96-inch access aisle in the "Universal" configuration (2010 ADA Section 502.2, ANSI A117.1 Section 502.2).
Access aisle: 60 inches minimum width, 96 inches for van-accessible non-universal (2010 ADA Section 502.3). Striped per state DOT or local standard.
Slope of stall and access aisle: 1:48 (2%) maximum in all directions (2010 ADA Section 502.4, ANSI A117.1 Section 502.4). This is the failure point. A stall poured at 1:40 to drain to the catch basin is a fail. Measure all four corners and the centerline with a digital level.
Signage: mounted at 60 inches minimum to the bottom of the sign per 2010 ADA Section 502.6, with the International Symbol of Accessibility (ISA). Van-accessible stalls require an additional "Van Accessible" designation.
Access aisle marking: "NO PARKING" required in some state amendments. Verify against the state accessibility code.
Most common failure: the stall surface is at 1:40, not 1:48. Retrofit is a full saw-cut and re-pour, with a six-figure cost on a project with multiple violations. Measure during walkthrough, retrofit before final.
What Are the Accessible Entrance Requirements?
The accessible entrance must be on an accessible route and identified by ISA signage if it is not the primary public entrance (2010 ADA Section 206.4, ANSI A117.1 Section 206.4).
Door clear width: 32 inches minimum clear, measured from the face of the door at 90 degrees open to the stop on the latch side (2010 ADA Section 404.2.3, ANSI A117.1 Section 404.2.3). Field tolerance: zero. A 36-inch door with a face-mounted closer arm that intrudes into the opening can measure 31-1/2 inches clear and fail.
Threshold height: 1/2 inch maximum, with 1:2 bevel on edges over 1/4 inch (2010 ADA Section 404.2.5, ANSI A117.1 Section 303). A 5/8-inch threshold is a fail.
Maneuvering clearance: governed by Table 404.2.4.1 in the 2010 ADA Standards. The required clearance depends on the approach direction (front, latch side, hinge side) and whether the door has a closer, a latch, both, or neither. The most common condition on a primary entrance, front-approach pull side, requires 18 inches beyond the latch side and 60 inches deep from the face of the door, with an additional 12 inches if both closer and latch are provided. Verify every door against Table 404.2.4.1 individually. Maneuvering clearance is a measured floor area, a trash receptacle, a signpost, or a planter installed in it after the architect's drawing fails the inspection. Changes in level within the maneuvering clearance are not permitted (1:48 slope and compliant thresholds excepted).
Door operating force (federal ADA): 5 lbf maximum for interior hinged doors and gates and for sliding or folding doors (2010 ADA Section 404.2.9). Federal ADA does not specify a maximum operating force for exterior hinged doors — the U.S. Access Board's guide notes that the force needed to overcome wind, stack pressure, and closer settings on exterior doors typically exceeds 5 lbf, and recommends powered or automatic exterior doors where high force is unavoidable. State amendments commonly impose limits (California CBC 11B-404.2.9 sets 5 lbf for both interior and exterior, with an 8.5 lbf exception where powered doors are provided; other states vary). Fire doors are excluded from the 5 lbf rule; fire-rated doors must use the minimum operating force allowed by the fire code, and most state codes cap this at 15 lbf where the fire rating permits.
Door closing speed: at least 5 seconds from 90 degrees open to 12 degrees from the latch (2010 ADA Section 404.2.8). Adjust the closer's sweep valve.
Hardware operating force: 5 lbf maximum, operable with one hand without tight grasping, pinching, or twisting of the wrist (2010 ADA Section 309.4, ANSI A117.1 Section 309.4). Lever handles, push/pull paddles, or U-shaped pulls pass; round knobs fail.
Hardware mounting height: between 34 inches and 48 inches above the floor (2010 ADA Section 404.2.7, ANSI A117.1 Section 404.2.7).
What Are the Interior Accessible Route Requirements?
The accessible route through the building connects the accessible entrance to every required accessible space. See the U.S. Access Board'sGuide to the ADA Standards: Accessible Routes for the full interpretive guidance.
Route width: 36 inches minimum clear, with 60-inch passing spaces at intervals not exceeding 200 feet for narrow corridors (2010 ADA Section 403.5.1, ANSI A117.1 Section 403.5.1).
Door clear widths along the route: 32 inches minimum at every door on the accessible route.
Changes in level: 1/4 inch maximum vertical, 1/2 inch with 1:2 bevel (2010 ADA Section 303).
Floor surfaces: stable, firm, slip-resistant. Carpet pile height 1/2 inch maximum (2010 ADA Section 302.2). Thick decorative carpet fails.
Protruding objects: objects mounted between 27 inches and 80 inches above the floor cannot protrude more than 4 inches into the route (2010 ADA Section 307, ANSI A117.1 Section 307). Wall-mounted fire extinguishers, water fountains, and signage that meet this rule individually frequently fail in combination; verify at every protrusion.
What Are the Accessible Toilet Room Requirements?
Toilet rooms are where the most measurable failures cluster. Run a tape measure on every dimension below. The U.S. Access Board'sGuide to the ADA Standards: Toilet Rooms is the authoritative interpretive resource for water-closet clearances, grab bar geometry, and lavatory requirements.
Door and entry:
Door clear width: 32 inches minimum (2010 ADA Section 404.2.3).
Maneuvering clearance per door type (push/pull, with/without closer and latch).
Inside the door, a clear floor space of 60 inches in diameter for a turning circle, or 60 inches by 60 inches for a T-turn (2010 ADA Section 304.3, ANSI A117.1 Section 304.3).
Water closet:
Centerline from sidewall: 16 inches to 18 inches (2010 ADA Section 604.2). Most-failed dimension. A flange set at 19 inches centerline because the rough-in plumber pulled to the rough wall instead of the finished wall fails.
Clear floor space at the water closet: 60 inches wide minimum (measured perpendicular from the side wall) by 56 inches deep minimum (measured perpendicular from the rear wall), per 2010 ADA Section 604.3.1. This applies to both wall-hung and floor-mounted water closets under the 2010 ADA Standards.
Seat height: 17 inches to 19 inches above the finished floor, measured to the top of the seat (2010 ADA Section 604.4). Verify with the seat installed, not the bare bowl rim.
Flush control: hand-operated or automatic; hand-operated controls must be on the open side of the toilet (2010 ADA Section 604.6) and comply with Section 309, which limits operable parts to the reach ranges in Section 308 (48 inches maximum AFF). A flush valve installed on the wall side is a fail.
Grab bars:
Sidewall grab bar: 42 inches minimum length, starting no more than 12 inches from the rear wall and extending at least 54 inches from the rear wall (2010 ADA Section 604.5.1, ANSI A117.1 Section 604.5.1).
Rear wall grab bar: 36 inches minimum length, extending from the centerline of the water closet at least 12 inches on one side and 24 inches on the other (2010 ADA Section 604.5.2, ANSI A117.1 Section 604.5.2).
Mounting height: 33 inches to 36 inches above the finished floor, measured to the top of the gripping surface (2010 ADA Section 609.4). The 2010 ADA Standards explicitly state in Section 609.4 that this range "provides an adequate tolerance and therefore no tolerance outside of the range at either end point is permitted." Verify after tile installation — a grab bar set at 34 inches against unfinished substrate measures 32-7/8 against finished tile and fails.
Grab bars must support 250 lbf in any direction (2010 ADA Section 609.8). Verify blocking documentation; the inspector may pull on the bar.
Lavatory:
Rim or counter height: 34 inches maximum above the finished floor (2010 ADA Section 606.3, ANSI A117.1 Section 606.3).
Clear floor space: 30 inches by 48 inches, positioned for a forward approach (2010 ADA Section 606.2, ANSI A117.1 Section 606.2).
Knee clearance: 27 inches minimum height at the front, reducing to 9 inches minimum height for 8 inches deep, 11 inches minimum depth at 9 inches above the floor (2010 ADA Section 306.3, ANSI A117.1 Section 306.3). Vanity aprons that extend below 27 inches fail.
Toe clearance: 9 inches above the floor minimum, 17 inches deep maximum (2010 ADA Section 306.2).
Pipes below the lavatory: insulated or otherwise configured to protect against contact (2010 ADA Section 606.5). Bare P-traps fail.
Faucet: operable with one hand, 5 lbf maximum operating force, no tight grasping/pinching/twisting (2010 ADA Section 606.4, ANSI A117.1 Section 606.4). Single-lever or sensor faucets pass; cross-handle faucets typically fail.
Mirror:
Bottom of reflective surface: 40 inches maximum above the finished floor (2010 ADA Section 603.3, ANSI A117.1 Section 603.3). If mounted above a counter or lavatory, the bottom edge can be up to 40 inches; if mounted on an open wall (no counter), the bottom edge is 35 inches maximum.
Dispensers and accessories:
Operable parts (paper towel, soap, toilet paper) within reach range: 15 inches to 48 inches above the finished floor for unobstructed forward or side reach (2010 ADA Section 308, ANSI A117.1 Section 308).
Toilet paper dispenser: 7 inches minimum, 9 inches maximum from the front of the water closet to the centerline of the dispenser, mounted 15 inches to 48 inches above the floor (2010 ADA Section 604.7, ANSI A117.1 Section 604.7).
What Are the Drinking Fountain Requirements?
Where drinking fountains are provided, at least one must be accessible for wheelchair users and at least one for standing users (2010 ADA Section 211.2, ANSI A117.1 Section 211).
Wheelchair-accessible fountain spout: 36 inches maximum above the finished floor (2010 ADA Section 602.4, ANSI A117.1 Section 602.4).
Standing fountain spout: 38 inches to 43 inches above the finished floor (2010 ADA Section 602.7, ANSI A117.1 Section 602.7).
Spout water flow: at least 4 inches high, parallel to the front edge (2010 ADA Section 602.5, ANSI A117.1 Section 602.5).
Clear floor space: 30 inches by 48 inches for forward approach at the wheelchair fountain (2010 ADA Section 305).
Operating force: 5 lbf maximum, operable with one hand (2010 ADA Section 309.4).
The ADA standard for high-spout standing fountains is more restrictive than ANSI A117.1 on minimum height — verify against both, hold to the more restrictive.
What Are the Counter and Service Window Requirements?
For sales and service counters, food service lines, ticket counters, and similar (2010 ADA Section 904, ANSI A117.1 Section 904):
Accessible portion of counter: 36 inches maximum height above the finished floor.
Accessible counter length: 36 inches minimum.
Clear floor space: 30 inches by 48 inches for a parallel approach.
Where a forward-approach knee space is provided: 27 inches minimum height, 30 inches minimum width, 17 inches minimum depth (2010 ADA Section 904.3.2).
Restaurant and retail TIs frequently install a 42-inch bar counter with no accessible 36-inch portion, a fail at final inspection.
What Are the Signage Requirements?
Signage failures are common because they are the last thing installed and the easiest to install incorrectly. Two distinct sign types matter at inspection:
Permanent room identification signs (signs identifying rooms or spaces — restrooms, exit stairs, electrical room — 2010 ADA Section 703.1):
Tactile characters (raised) and Grade 2 Braille required.
Mounting height: 48 inches minimum measured from the finished floor to the baseline of the lowest tactile character; 60 inches maximum measured from the finished floor to the baseline of the highest tactile character (2010 ADA Section 703.4.1). A common installer error is measuring 48"–60" to the same character — that is not what the standard says.
Mounting location: on the latch side of the door (2010 ADA Section 703.4.2). Where the latch side has no wall, mount on the nearest adjacent wall. At double doors with one active leaf, mount on the inactive leaf; at double doors with two active leaves, mount on the right of the right-hand door.
Clear floor space of 18 inches by 18 inches in front of the sign, centered on the tactile characters, with no obstruction (2010 ADA Section 703.4.2).
Directional and informational signs (signs giving information about functional spaces or directing users — 2010 ADA Section 703.5):
Visual characters required.
Character height per viewing distance per 2010 ADA Table 703.5.5.
Finish: non-glare, high contrast between characters and background.
Confirming which ADA and ANSI A117.1 provisions apply to a specific commercial occupancy, and where the more restrictive rule resolves on each element, is where many pre-CO walkthroughs stall.Melt Code returns the applicable sections with citations and reasoning shown, so the GC can document the basis for every measured condition before the inspector arrives.
How Should the Walkthrough Be Documented?
Every measured condition needs three records: the measurement itself, a photo with a tape measure or level visible, and a date. This is not bureaucratic overhead; it is the documentation that wins a contested inspection.
Use the checklist below as the primary record. Mark Pass / Fail / N/A on every line.
For every Fail, write the as-measured dimension, the required dimension, and the responsible trade in the Notes column.
Photograph every fail with a tape measure or level showing the as-built value. The photo and the checklist entry must be dated.
For every Pass at a dimension close to the threshold (within 1/4 inch on a fixed dimension, or within 0.5% on a slope), photograph and document anyway. These are the items the inspector is most likely to re-measure.
Issue a punch list to responsible subs by trade. Verify retrofit by re-measuring before the inspector's visit.
Download the ADA Pre-CO Walkthrough Checklist (PDF)
The full walkthrough checklist — organized to match this article's section order, with code citations on every line, a Pass/Fail/N/A field, and a Notes column- is available as a printable PDF below. Print, clip to a board, and walk the building.
FREQUENTLY ASKED QUESTIONS
What is the most common reason ADA final inspections fail?
Slope of accessible parking stalls and access aisles exceeding 1:48 (2%). Most concrete pours come in between 1:40 and 1:50 because finishers pull cross-slope to drain. A digital level reading at all four corners of the stall during pre-walkthrough catches this two weeks before the inspector does.
Does the GC or the architect own ADA compliance at final inspection?
The architect documents accessibility on the drawings; the GC builds to the drawings; the trade installs to the specs. At final inspection, the GC presents the building and is the party responsible for as-built compliance under most construction contracts. The architect's stamp does not transfer liability for installation accuracy.
What is the difference between the 2010 ADA Standards and ANSI A117.1-2017?
The 2010 ADA Standards are federal civil-rights requirements enforced by the Department of Justice. ANSI A117.1-2017 is the technical built-environment standard referenced by the IBC and enforced by the AHJ. Where the two differ on a specific dimension, the more restrictive one applies. State accessibility codes (e.g., California Chapter 11B) may impose additional requirements beyond both.
Can a closer-installed door pass the 5 lbf operating force requirement?
Yes, but only when the closer is properly adjusted at the sweep and latch valves. New closers ship at higher settings and require field adjustment. Measure with a force gauge after the closer is installed, adjust on site, and re-measure. Document the measurement.
What is the field tolerance on the water closet 16-18 inch centerline dimension?
There is no field tolerance — the range is the tolerance. The 2010 ADA Standards explicitly state, in the language addressing Section 609.4, that where a requirement specifies a range, "the range provides an adequate tolerance and therefore no tolerance outside of the range at either end point is permitted." A flange set at 15-3/4 inches or 18-1/4 inches fails. The most common failure is a rough-in plumber pulling to the rough wall instead of the finished wall, ending up at 19 to 20 inches centerline after tile and substrate. Verify rough-in dimensions against the finish wall, not the substrate.
Are grab bars required to be tested for load capacity at final inspection?
The inspector may pull on the grab bars during inspection. The 250 lbf load requirement (2010 ADA Section 609.8) is verified through blocking documentation and visual inspection of fastening, not destructive testing. Maintain blocking documentation in the project record — photos of the wood blocking before drywall, mounting screw schedules, and structural backing details.
What happens when an ADA failure is found at final inspection?
The inspector issues a correction notice. The Certificate of Occupancy is held until the correction is verified by re-inspection. Most jurisdictions allow correction without a new fee for the first re-inspection cycle; subsequent cycles carry re-inspection fees. The construction contract typically places retrofit cost on the GC, who may have recourse against the responsible sub, depending on the cause.
Primary Sources
The dimensional thresholds and code citations in this article and the downloadable checklist are drawn from the following authoritative sources. Where a reader needs to verify a specific requirement against the original, these are the references AHJs and accessibility specialists work from.
2010 ADA Standards for Accessible Design — U.S. Department of Justice. The federal civil-rights standard enforced under Titles II and III of the Americans with Disabilities Act.
ADA Compliance Brief: Restriping Parking Spaces — U.S. Department of Justice. The authoritative reference for accessible parking dimensions and slope.
Guide to the ADA Standards: Entrances, Doors, and Gates — U.S. Access Board. Interpretive guidance on door clear width, maneuvering clearance, operating force, and hardware.
Guide to the ADA Standards: Accessible Routes — U.S. Access Board. Interpretive guidance on route widths, slopes, surfaces, changes in level, and protruding objects.
Guide to the ADA Standards: Toilet Rooms — U.S. Access Board. Interpretive guidance on water closet clearances, grab bar geometry, lavatory dimensions, and dispenser placement.
U.S. Access Board — All ADA Guidance Documents — index of all Access Board interpretive guides, including operable parts, protruding objects, signs, and chapter-by-chapter Standards guides.
ANSI A117.1-2017 is not freely published online and must be purchased from theInternational Code Council. California Building Code Chapter 11B amendments are published by theCalifornia Building Standards Commission.
Related Building Code Resources
- Overview GuideBIM Construction Software: The Complete Guide for Architects and Engineers
- Overview GuideBuilding Permit Drawings Software: The Complete Guide for Architects and Designers
- Building CodesThe Best 3D Rendering Software for Architects in 2026: A Workflow-First Comparison
- Building CodesBest AI to Generate Floor Plans: A Professional Comparison for Architects and Designers
- Building CodesArchitectural Design Software in 2026: A Workflow-First Comparison With Per-Stage Tool Comparisons
MeltPlan
A curated stream of preconstruction intelligence, estimating innovation, takeoff breakthroughs, workflow advancements, and expert perspectives—powered by the AI and technology shaping the future of construction.
Visit SiteDon't miss what's shaping AEC
The latest on preconstruction, codes, AEC news & trends — so you're always in the know.